

Sunday, December 22, 2013
Sunday, December 8, 2013
Kuretake Zig Wink of Stella Glitter Brush Pen
It’s a well-established fact that I do like shimmery, shiny things. The more bling the better. When I saw this new glittery brush type pen…. well I just knew I had to have them !

Once the dazzling Zig Wink of Stella glitter brush pen adds its fairy tale touch to your decorative projects, they will look as if they were sprinkled with pixie dust. The soft nylon brush tip lays down thick and thin lines of shimmery colour that are perfect for decorative lettering, drawing, and adding highlights to stamp art. Unlike some methods of adding glitter, this pen lets you add sparkle in a clean and controlled manner, without creating gunky residue. The water-based pigment ink is of archival quality and is filled with beautiful specks of fine glitter. Wink of Stella ink is photo-safe, acid-free, and lightfast.
I searched every where to find them and now they have arrived in 7 of the 13 colours. (Silver, Gold, Pink, Brown, Green, Red and Black (not on photo)

As only a few was imported from overseas, they will be on our website ABC CRAFTS
Once the dazzling Zig Wink of Stella glitter brush pen adds its fairy tale touch to your decorative projects, they will look as if they were sprinkled with pixie dust. The soft nylon brush tip lays down thick and thin lines of shimmery colour that are perfect for decorative lettering, drawing, and adding highlights to stamp art. Unlike some methods of adding glitter, this pen lets you add sparkle in a clean and controlled manner, without creating gunky residue. The water-based pigment ink is of archival quality and is filled with beautiful specks of fine glitter. Wink of Stella ink is photo-safe, acid-free, and lightfast.
I searched every where to find them and now they have arrived in 7 of the 13 colours. (Silver, Gold, Pink, Brown, Green, Red and Black (not on photo)
As only a few was imported from overseas, they will be on our website ABC CRAFTS
Sunday, November 10, 2013

Thursday, September 5, 2013
HOW TO USE SHRINK PLASTIC
Thanks to Ideas Magazine LINK HEREthat was on Expresso Breakfast TV3 this morning showing us the wonders of Shrink Plastic


Materials
• pictures to trace
• one sheet of shrink plastic
• large circle punch (or use scissors)
• craft punch and hammer
• permanent marker
• masking tape
• firm cardboard
• fine-grit sandpaper
Step-by-step
• pictures to trace
• one sheet of shrink plastic
• large circle punch (or use scissors)
• craft punch and hammer
• permanent marker
• masking tape
• firm cardboard
• fine-grit sandpaper
Step-by-step
Sand the shrink plastic lightly to prepare it – first in a horizontal direction and then vertical. We used very fine sandpaper.
Punch a circle out of the plastic, about double the size of the button you want to make (the plastic shrinks by about half when it is baked).
Stick the circle with the roughened side facing upwards over the picture that you want to use for the design for your button. We used sheet music. Trace the design onto the plastic with your marking pen.
Punch the buttonholes: First punch out a paper circle in the same size, fold it in quarters and then unfold the last fold. Punch a hole in the middle of the foldline. Open up the circle completely - you now have a template for the buttonholes.
Place the plastic circle on the piece of cardboard and bake it for 3-5 minutes in an oven preheated to 170°C. NOTE Do not place the plastic directly onto a baking tray.
The plastic will start to shrink and will contort and twist in the oven. Leave it in the oven until it lies flat again and has shrunk by half. Remove and leave to cool.
Tuesday, September 3, 2013
POLY SHRINK PLASTIC
Hello to all our followers,
Poly Shrink Plastic was used by Ciskia Hanekom, and she made these adorable buttons to put on a cardigan.

"IDEAS MAGAZINE / IDEES TYDSKRIF
SEPTEMBER 2013 ISSUE
Thank you for the picture
Article on making buttons with Poly Shrink Plastic in the latest Ideas Magazine.
Please note this magazine is available in english and africaans
Saturday, August 10, 2013
THANK YOU
Hello to all my followers,
This card I made keeping in mind to say thank you to all my followers who pop in regular to have a look at our blog. Oh please, do leave a comment, as I would value feed back !!!
The card is one of my famous "Keep It Simple" card that one puts quick together.
The backing mat is a Spellbinder Die Labels 3 (S4-189) and put through the Cuttlebug with the "Swiss Dots" embossing folder. The green circle is cut on the Cricut machine, and the resin rose from the ABC Resin collection.

The resin rose close up. This was black and hand painted.

Monday, July 8, 2013
BAKERS TWINE FLOWER
WOW no wonder it is getting cold here, I have made another card....lol
Must be getting my mojo back yippy.
The flower I made using Spellbinder S5-143
Centered it with some Flax Bakers Twine and added a couple of acrylic rhinestones
The leave, cream and grey card was cut on the Cricut machine.
the silver borders is peel offs left over from between a border.

Wising you all well, till next time !! Charlie
Friday, July 5, 2013
DAY WITH THE SILHOUETTES CAMEO
Hello all,
Today is the day I can really feel we have winter here in Pretoria. Sun is playing hide an seek above the clouds and the wind is chilly outside.
The Silhouettes Cameo sure is a learning curve to the Cricut Machine ... lol
Or is it that I am just aging and the brain is not taking things in quick enough to my liking :-)
So taking it one step at a time from a very sticky mat, frustrations and wow even cutting the top of the mat. Oh well at least did get 2 items cut, which I'm proud to show he he
The first card is a gatefold heart card, my first and had to add some gems and ribbon. On the card for inside, peel-off border was added to stand out.

My second card was also a nice cut out square card. I used blue card stock to practice, but then coloured it in with some markers and added once again some gems (sorry just love bling !)

Saturday, June 22, 2013
FATHER'S DAY
Hello to all my peeps,
Thanks for visiting my blog, even though I have been so silent. Well at long last got some crafting time !!
This Fathersday card was a image I stamped years ago and just laying in my stash to be used. A friend had it specially made for her, so felt very honored to be able to use it. Thanks Lenore :-)

I nearly did colour the stamp in, but my 6th sense told me to make it a silhouette. To add some bling I used dots form the peel-offs I have.
I also made a Afrikaans card for a friend here in South Africa with just the silhouette. This rubber stamp is from my long time stash

To brighten this card I used some Card Candi on the corners.
Wishing you all a wonderful week ahead.
Friday, May 3, 2013
ABC CRAFTS
a BIG HI to all my followers,
My apologies for not posting much the last month.
My chair though it had enough of me sliding over the floor from table to pc the last couple of years, and just collapsed in two. Well ended up all browsed and sore, but hey thanks to the Lord, up and about again. Now for all the catching up..... oh dear
This card was quickly done on glossy white cardstock. I used Momento markers direct on the rubber stamp and then stamped it on the glossy card. The best way to get a clear impression is to stand when stamping on glossy card.
Thank for popping around, enjoy your weekend
The monthly special is up on http://abccrafts.weebly.com/
My apologies for not posting much the last month.
My chair though it had enough of me sliding over the floor from table to pc the last couple of years, and just collapsed in two. Well ended up all browsed and sore, but hey thanks to the Lord, up and about again. Now for all the catching up..... oh dear

Thank for popping around, enjoy your weekend
The monthly special is up on http://abccrafts.weebly.com/
Saturday, April 6, 2013
FLOWER CARD
Card side is 14 x 14cm
This flower card was cut on the Cricut, after designing it on the Gypsy.
It has a round window in front. I cut it twice on Cutmates Roquefort
I wanted a layered flower look

As this is my first time making this card, I decided to make a shadow box.
Stars was some I had in my stash, and some red card candi just completed the look

This is the left inside and as you can see the layered look is stunning :-)
The shadow box was made between the 2 layers underneath the cup cake.
Cup cake was cut out on Cricut a while ago, and thought it is just right for a birthday!

The right inside of the card I used double side tape and some loose glitter powder.
The sentiment (a gift from a friend) was glued on top of the glitter with leaves.
THANK YOU
Thank you to the ladies that did pop into and left a comment on "THANK YOU STASH"
My apologies for not posting earlier, was abit out of action from a fall, but well on the way to recovery.
Parcels will be going out this week, so...... surprises are on the way!!!!
I have decided to say thank you to 3 ladies, so keep watching your post box.
My apologies for not posting earlier, was abit out of action from a fall, but well on the way to recovery.
Parcels will be going out this week, so...... surprises are on the way!!!!
I have decided to say thank you to 3 ladies, so keep watching your post box.
Thursday, March 14, 2013
THANKS STASH
This is now offical closed, and I would like to say thanks to the ladies that popped in and left a comment. Suprise pack on their way soon !!!
A special thanks is going from my heart to all my regular peeps which are my overseas friends. Thank you very much for visiting my blog on a regular basis, as I can see crafts is most definite more alive overseas as here in South Africa. Please keep popping in as I have decided to reward one of my friends with a gift. I know stash is always welcome in card making and for scrap pages alike.
I'm not going to say anything more as the parcel contains will be a surprise *wicked smile*
How to get into the draw ????
From now till 3rd of March please leave me a comment every time you pop in, as to why you like to visit my blog. Any suggestions or tips are also welcome *smiling*
You may ever refer a friend or two, and let them leave a comment with who referred them.
Please do sign in as a follower.
Wonder if I should give a glue to the stash ??? What do you think mmm....
Sunday, March 3, 2013
JOURNAL - NEVER TO OLD
Angella, visited my blog sometime ago, thanks :-))
Today I was prompt by the Lord to go and visit her blog here Angella Dee Designs
As I was scrolling down, me eye caught some words on a double journal page she made.

As I have been going through some trails lately and today being my birthday, these words just leapt from the page and spoke to me. Thanks Angella, you made my day, and thank the Lord for all blessing in my life, and bringing people on my path who enrich it.
Please do go and visit her site: Angella Dee Designs
Tuesday, February 12, 2013
VALENTINE CARD
Hello to all my followers,
Learning a new accounting program is never easy and when press for time, not a good combination at all. But as I have learnt, the Lord don't put things on our paths we can't handle, even if it goes at a snails pass he he he
So that is why crafting is so wonderful, as it unleashes not only creativity, but a natural stress reliever and listening to music helps even better.... yippy.
Have been making cards, but to me it feels to few.... mmm need more mojo :-))
Items used: A5 Ripple card stock, polka dots embossing folder, Spellbinder die.
A heart cut from cricut, some hot fix gems and a few card candi.
And that is me wishing you a wonderful week with lots of blessing !!
Learning a new accounting program is never easy and when press for time, not a good combination at all. But as I have learnt, the Lord don't put things on our paths we can't handle, even if it goes at a snails pass he he he
So that is why crafting is so wonderful, as it unleashes not only creativity, but a natural stress reliever and listening to music helps even better.... yippy.
Have been making cards, but to me it feels to few.... mmm need more mojo :-))

Items used: A5 Ripple card stock, polka dots embossing folder, Spellbinder die.
A heart cut from cricut, some hot fix gems and a few card candi.
And that is me wishing you a wonderful week with lots of blessing !!
Wednesday, January 16, 2013
Happy Birthday Card
Good evening
This is my first post since the start of the new year and I hope that all that reads this post have had a very nice New Year. Since the beginning of December I have not had a lot of time to craft but my stash of spare cards have taken a big loss. So because of that I need to replenish my stash very quickly. So without further chatting here is my latest card that I made.
Thank you for reading my quick post, I will be back soon.
Hugs,
Marika
This is my first post since the start of the new year and I hope that all that reads this post have had a very nice New Year. Since the beginning of December I have not had a lot of time to craft but my stash of spare cards have taken a big loss. So because of that I need to replenish my stash very quickly. So without further chatting here is my latest card that I made.
 |
| A close-up of the Happy Birthday stamp. |
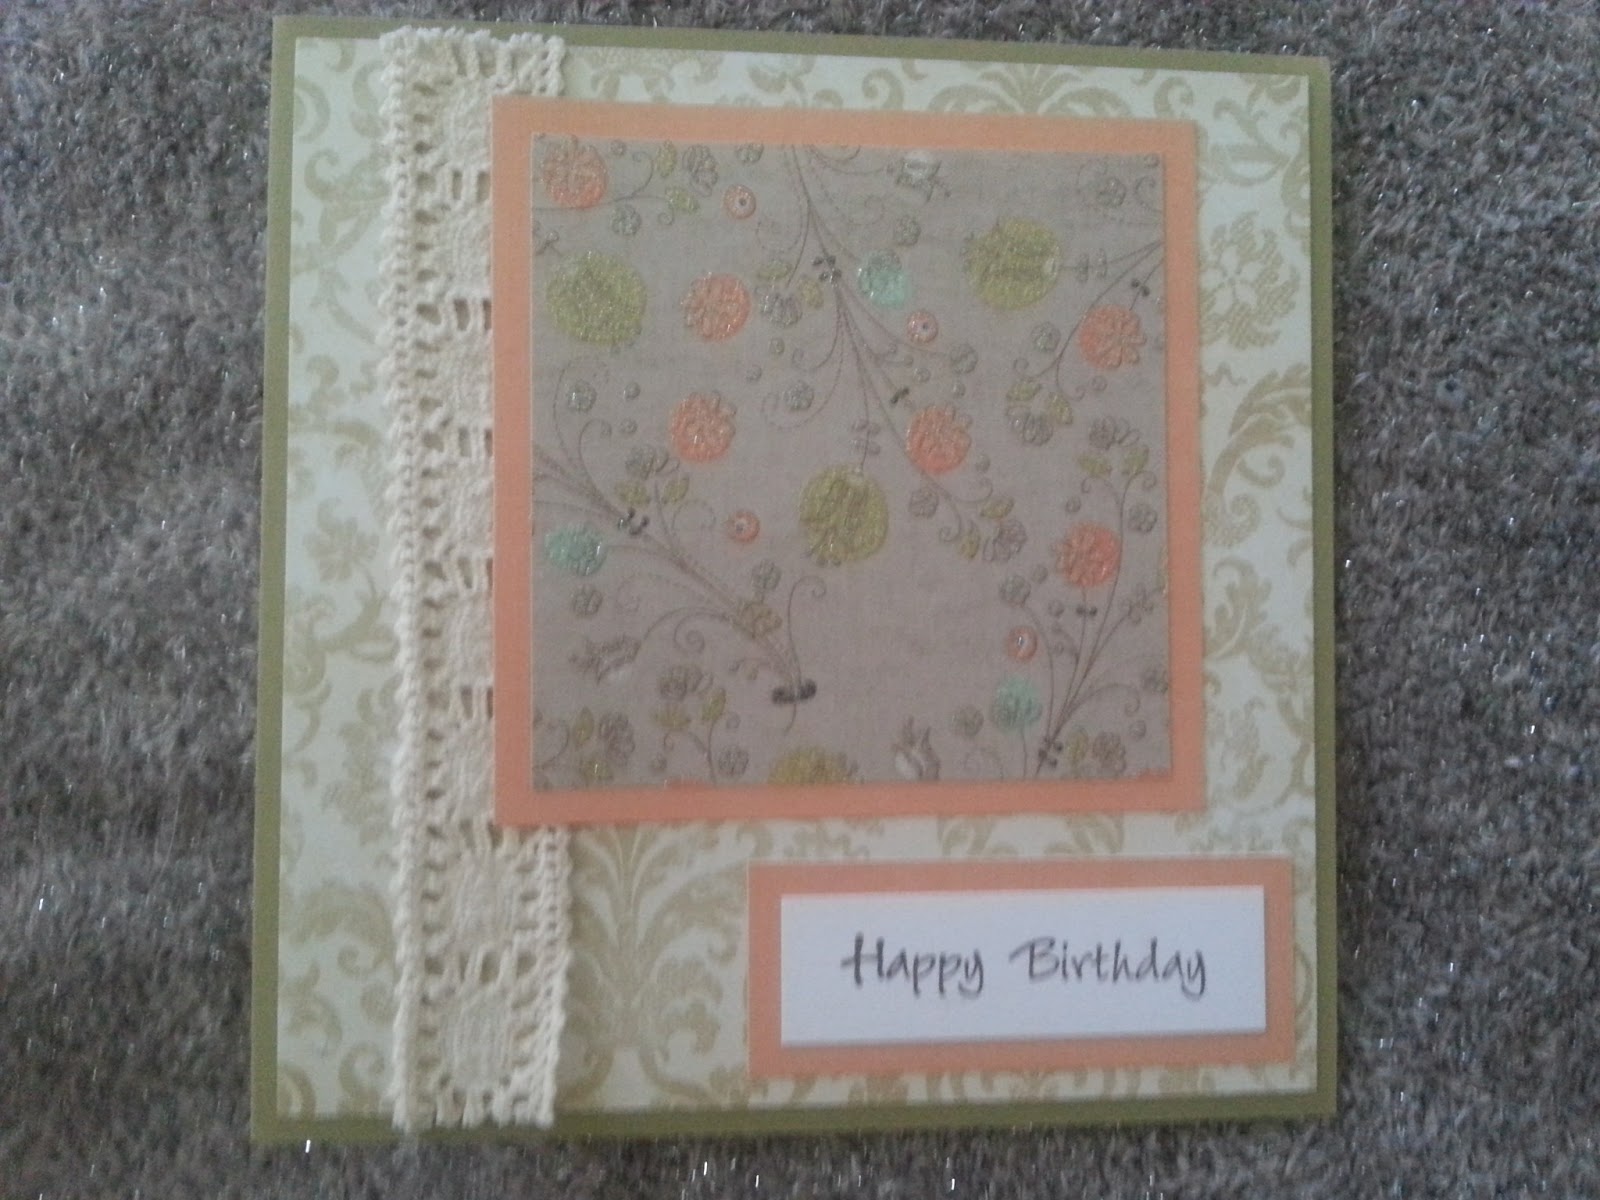 |
| My first Happy Birthday card for 2013. |
Thank you for reading my quick post, I will be back soon.
Hugs,
Marika
Tuesday, January 15, 2013
QUILLING
Hello to all, wishing you all a super week.
 I have a new bug that real caught me this time around and it is only because I had a special broad for "Quilling" my paper and it didn't uncurl before I glued it ...... yippy
So this is the result, a nice card even if I have to say so myself he he he
Thanks to some embossing and a tag from a friend, it just finished this card.

Friday, January 11, 2013
VALENTINE'S CARD
Hello to all,
 This year has bearly begun and guess what, I made a couple of cards :-)) thanks to my new present I received ..... an E-Bosser that is just like the cuttlebug, but in A4 size and electric.
So I will be sharing them with you the next couple of days.
Firstly will be the Spellbinder S2-014 that I cut and embossed for a Valentines card
Decorated with large red gems and a sticker from Chutney Mini Me Stickers - Valentine. The back ground is Glitz Glitter card stock.
 This year has bearly begun and guess what, I made a couple of cards :-)) thanks to my new present I received ..... an E-Bosser that is just like the cuttlebug, but in A4 size and electric.
 So I will be sharing them with you the next couple of days.
Firstly will be the Spellbinder S2-014 that I cut and embossed for a Valentines card
Decorated with large red gems and a sticker from Chutney Mini Me Stickers - Valentine. The back ground is Glitz Glitter card stock.
Tuesday, January 1, 2013
NEW YEAR 2013
Wishing all my followers and peeps a Happy New Year
filled with lots of blessings and lots of mojo for crafting :-))
.jpg)
filled with lots of blessings and lots of mojo for crafting :-))
.jpg)
Subscribe to:
Posts (Atom)